
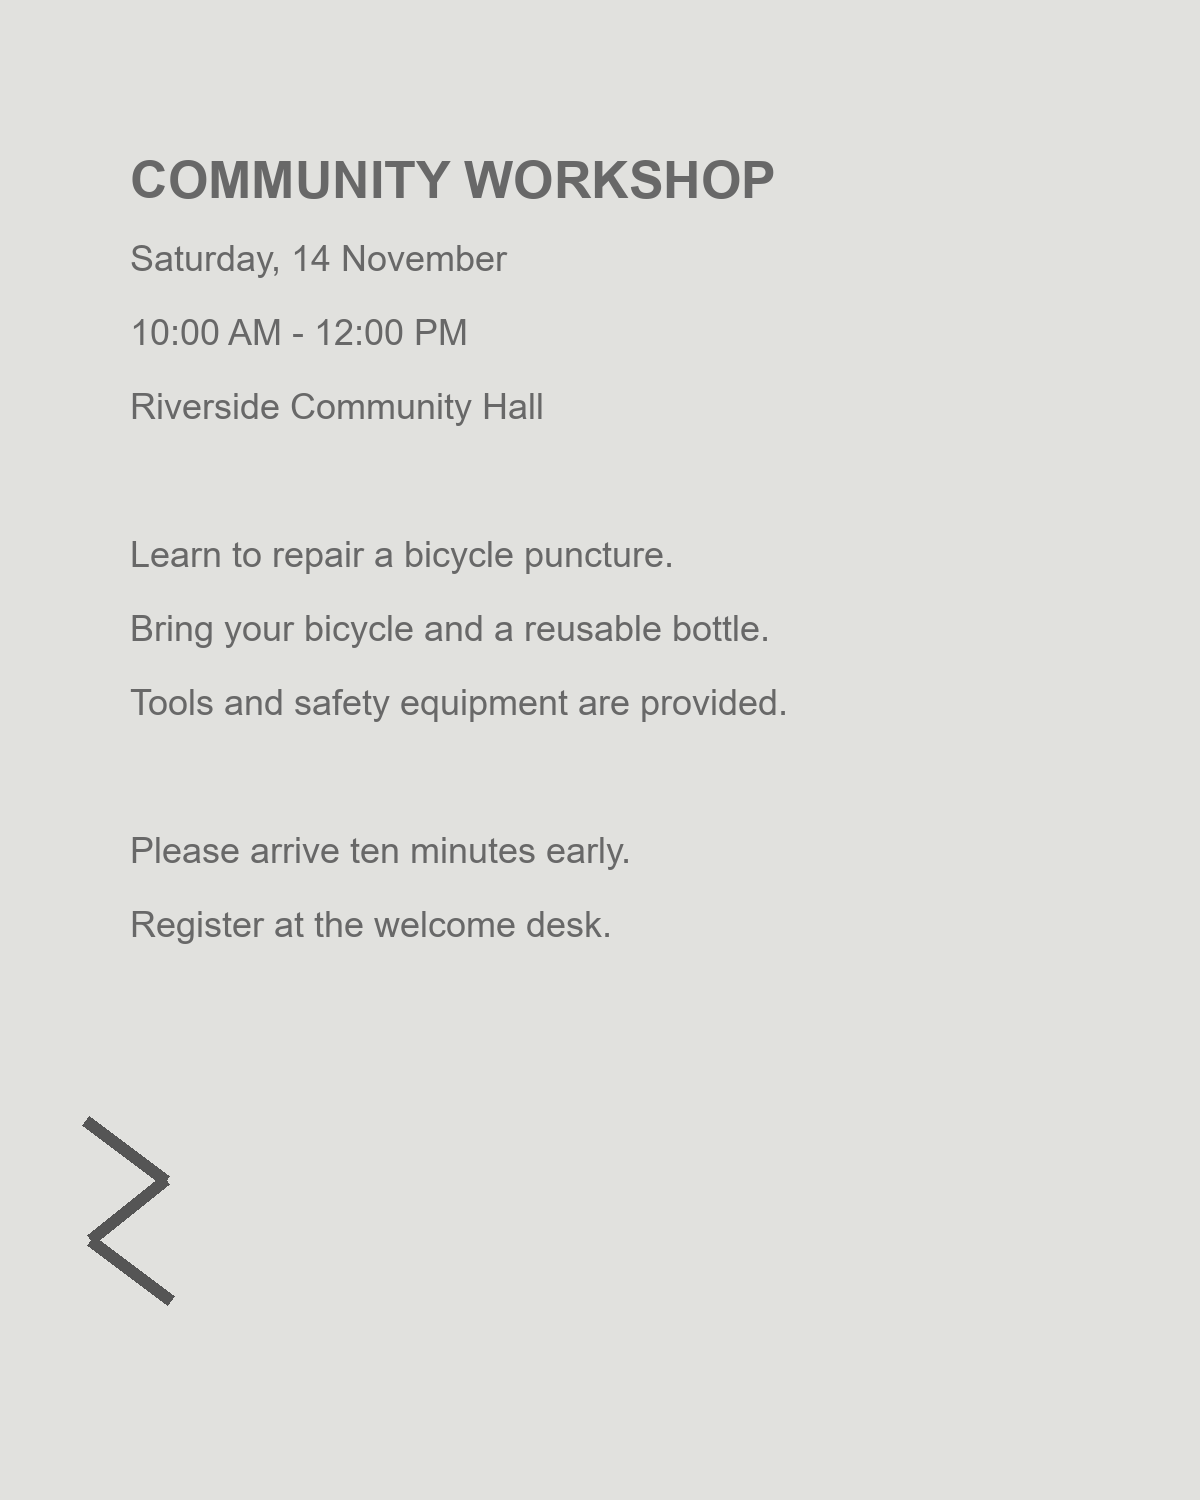


Faint ink, paper shading and stray marks can make a scan difficult to read. The image editor in i2OCR lets you inspect adjustments before recognition. It is available for an uploaded image and for the selected page of a PDF. The example uses a workshop notice with a small unwanted mark in the margin.
In the example, the Faint text preset makes the notice easier to inspect, and the Eraser is used only on an isolated zigzag in the margin. The original and enhanced previews are compared before applying the changes.
Open your source and choose Enhance image
Start in Image OCR or PDF OCR and upload your source. For a PDF, navigate to the page you want to recognize. These adjustments belong to the displayed page; review other pages separately.
Select Enhance image in the source toolbar. The dialog opens a preview with Original and Enhanced views. Use Fit page to see the whole page and zoom in to inspect small letters.
Decide what you are trying to improve first: a gray background, faint ink or an isolated margin mark. Changing every setting at once makes it harder to see which adjustment helped.
Start gently, then inspect the letters
Try Clean scan for paper shading or Faint text when the print is difficult to distinguish from the background. A preset is a starting point. Compare the enhanced preview with the original and reduce an adjustment if punctuation or thin strokes begin to disappear.
Under Fine tune, adjust brightness, contrast, background cleanup or sharpness as needed. Select Color when colored marks carry meaning, Grayscale for a neutral scan, or Black & white when a two-tone result is appropriate. Threshold is available with Black & white.
Erase only marks you are sure you do not need
Use Eraser with a small brush for an isolated speck or mark. Use Rectangle to clear a larger, clearly empty margin area. Both tools paint white over the area you mark. Keep them away from letters, punctuation, table rules and other content that belongs in the transcript.
Use Hand to move around a zoomed preview. If a stroke removes too much, choose Undo; Redo restores a reversed edit. Reset returns the enhancement settings and marks to their starting state.
The example removes a margin mark, not part of the notice. Do not erase a character merely because it resembles scan noise; compare the original first.
Apply the changes, then run OCR
Switch between Original and Enhanced once more. Check the lightest text, the smallest punctuation and any edits near the page edge. Select Apply changes to return to the OCR preview. Cancel closes the dialog without applying that draft.
Applying enhancement does not start recognition. Review the OCR language, mode and selected area, then select Start and complete verification. The chosen enhancement is used for that recognition request.
Check whether the result is actually more useful
Compare the recognized words with the source. A visually cleaner image is helpful only if the characters remain intact. Check digits, accents, punctuation and similar-looking letters before copying or downloading the result.
If a passage is still difficult, return to the editor and use a smaller selection or gentler enhancement. Severe blur, a clipped line or missing pixels may require a better scan or photo. Repeated sharpening cannot recreate information that was never captured.
Common questions
Does Enhance image run OCR automatically?
No. Apply changes returns you to the preview with the enhancement selected. Recognition begins when you choose Start and complete the verification prompt.
Can I use the editor on a scanned PDF?
Yes. Open the PDF, display the page you need and choose Enhance image. Settings are associated with that source page. Check other pages individually rather than assuming one adjustment suits the whole document.
Will Black & white always improve recognition?
No. Thresholding can make dark print stand out, but it can also remove faint strokes or join neighboring letters. Use Original and Enhanced to inspect the actual text before applying it.
Can the eraser remove a word before OCR?
It can paint white over the selected area, so a word you erase may no longer be available to recognition. Use it only for content you intentionally want to exclude, and do not treat it as secure redaction of the original document.
Can I fix an out-of-focus photo this way?
Small adjustments may help you inspect it, but they cannot guarantee recovery of blurred or missing characters. A sharper, evenly lit replacement image is often the better source.
Prepare the page, then read the words.
Open Image OCR to try the editor, or use the same controls on a scanned PDF page.